

Create an Operating System
This is the class that contains all the programs, directories, files etc and in-turn simulates the full Operating System.
flowchart TB
  subgraph row1[" "]
    direction LR
    OS["UOperatingSystem"] --> Progs["UOperatingSystemProgramsCollection"]
    OS --> Dirs["UOperatingSystemDirectoriesCollection"]
    OS --> Widget["UOperatingSystemWidget"]
    OS --> Settings["UOperatingSystemSettingsData"]
  end
  subgraph row2[" "]
    direction LR
    Explorer["UOperatingSystemExplorer"] --- Terminal["UOperatingSystemTerminal"] --- Store["UOperatingSystemStore"]
  end
  Progs --> Explorer
Creating a new OS
Section titled “Creating a new OS”To create a new Operating System, right click in Content Browser and select Blueprint Class. From the resulting window, search for Operating System and you can select between OperatingSystemUnix or OperatingSystemNonUnix.
For this tutorial however, let’s stick with Operating System Non Unix so select it and name it BP_Tut_OS.
The primary reason to separate them was to simulate an environment as the name implies.
| Operating System Unix | Operating System Non-Unix |
|---|---|
| Simulates an environment similar to Unix based Operating systems like Linux, Mac OS etc. | Simulates an environment similar to Non-Unix based Operating System like Windows. |
Under the hood, implementation differences between these two types are as follows:
- Partitions are only supported in Non Unix.
- Disk letters (such as C:, D:\ etc) are only supported in Non Unix.
- Paths are handled differently between the two types. Unix will be
/Users/Desktopand Non-Unix will beC:\Users\Desktop - Root user and command only exist for Unix.
- Repository class only exist for Unix.
- Root directory only exist for Unix.
Some of the terminal commands bundled with the plugin only supports a certain Operating System type. For example, the terminal command /OperatingSystemSimulator/OperatingSystemContent/Unix/Blueprints/Programs/Terminal/Commands/BP_CMD_AptGet only supports Unix based Operating System.
Modifying Operating System properties
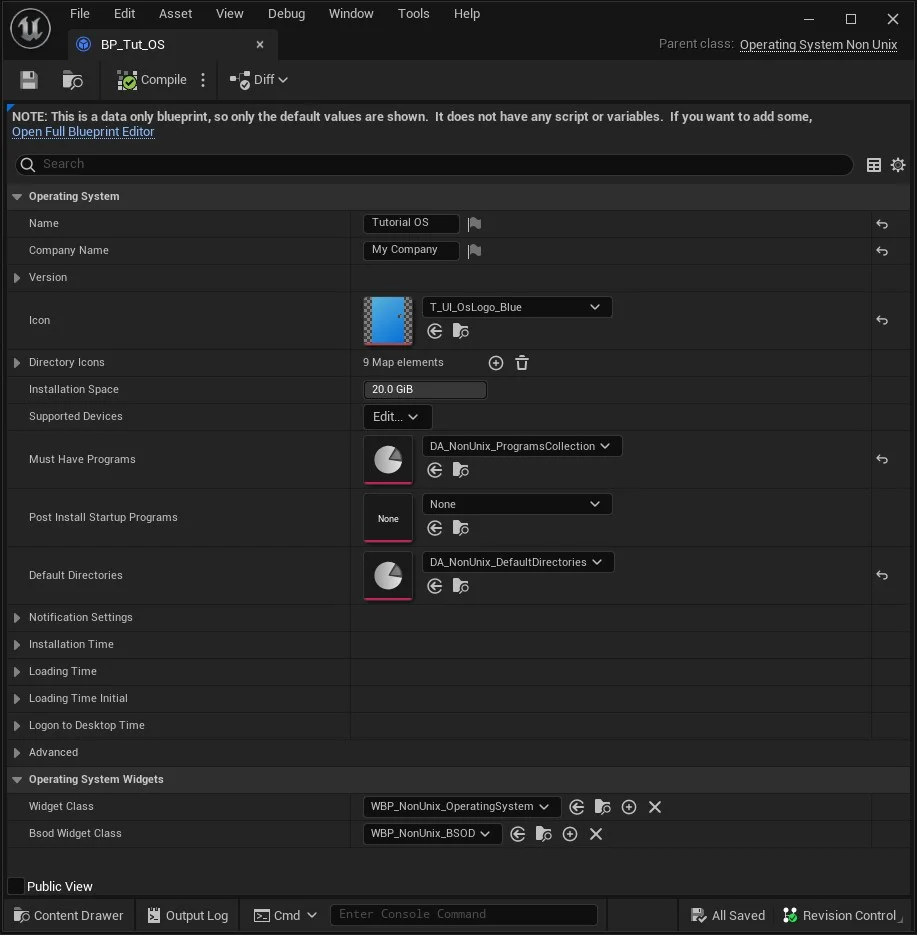
Section titled “Modifying Operating System properties”Open BP_Tut_OS and set the following properties:
- Name - Tutorial OS (or any name you like)
- Company - My Company (or any name you like)
- Icon - T_UI_OsLogo_Blue (or set according to your likeness)
- Must Have Programs - DA_NonUnix_ProgramsCollection
- Default Directories - DA_NonUnix_DefaultDirectories
How collections wire in
Section titled “How collections wire in”flowchart TB OS["BP_Tut_OS"] --> PC["DA_NonUnix_ProgramsCollection"] OS --> DC["DA_NonUnix_DefaultDirectories"] PC --> P1["BP_Prog_Explorer"] PC --> P2["BP_Prog_Terminal"] PC --> P3["BP_Prog_Store"] DC --> D1["Desktop / Documents / Downloads"]
Duplicate DA_NonUnix_ProgramsCollection and DA_NonUnix_DefaultDirectories from OperatingSystemContent/NonUnix/Blueprints/ when you need to add or remove programs from your tutorial OS.
If set everything as mentioned, you will end up with an Operating System Blueprint like below:
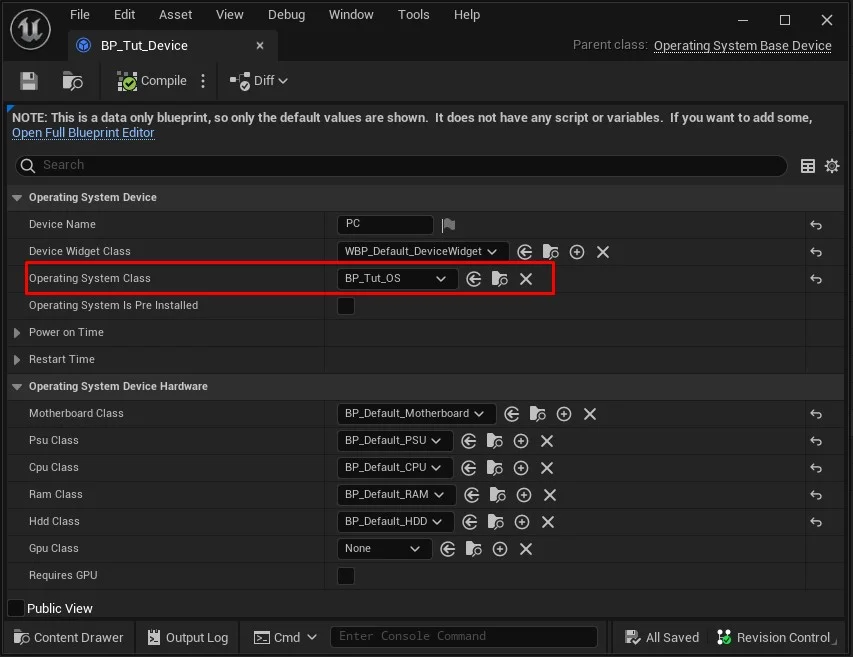
Now that our Operating System is created, lets assign it to our device that we previously created like in the following screenshot.
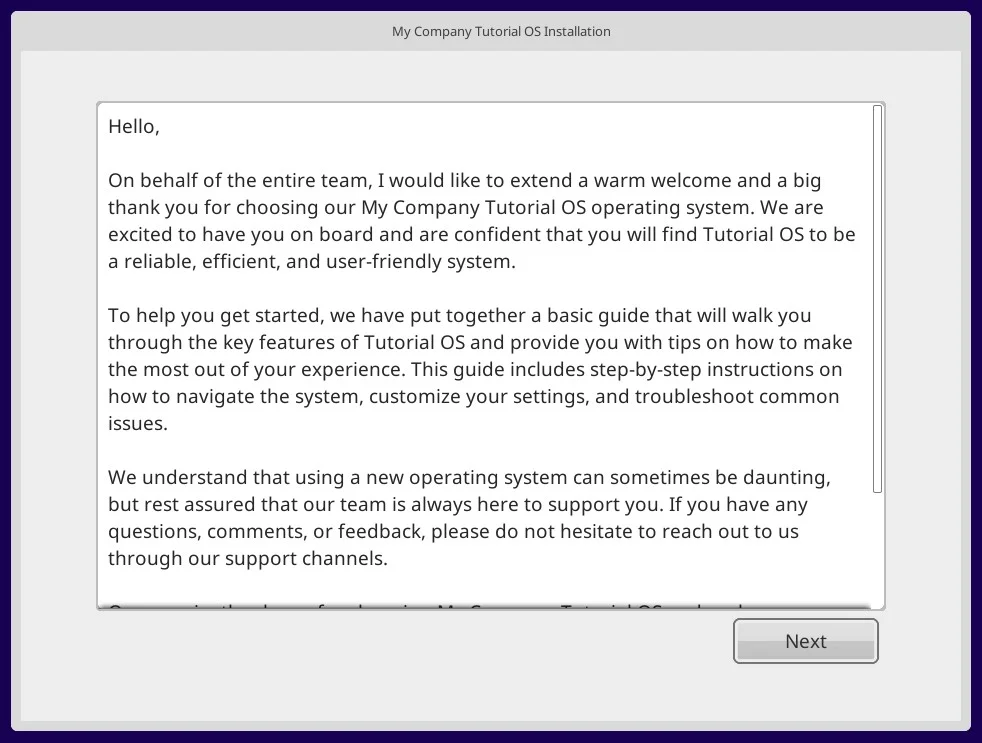
If you have placed the device actor in world, it’s time to press play. You should now be greeted with the Operating System installation screen.
Conclusion
Section titled “Conclusion”You now have a bootable tutorial OS. Visual chrome is all UMG — subclass UOperatingSystemWidget and program widgets to reskin the desktop.
Next steps
Section titled “Next steps”| Goal | Tutorial |
|---|---|
| Add a desktop app | Create a custom program |
| CLI that affects the level | Custom terminal command |
| Phone / laptop | Portable device |
| Persist player changes | Save and load |