

Create a Device
Device (UOperatingSystemBaseDevice) is responsible for constructing the Operating System and saving information. In this section, we will create our custom device and assign it to the previously created device actor.
flowchart TB
  subgraph row1[" "]
    direction LR
    Device["UOperatingSystemBaseDevice"] --> MBB["UOperatingSystemMBB"]
  end
  subgraph row2[" "]
    direction LR
    CPU["UOperatingSystemCPU"] --- RAM["UOperatingSystemRAM"] --- HDD["UOperatingSystemHDD"] --- GPU["UOperatingSystemGPU"]
  end
  subgraph row3[" "]
    direction LR
    Widget["UOperatingSystemDeviceWidget"] --- OS["UOperatingSystem class"]
  end
  MBB --> CPU
  Device --> Widget
  Device --> OS
Creating a new device
Section titled “Creating a new device”To create a new device, right click in Content Browser and select Blueprint Class. From the resulting window, search for Operating System Device and select OperatingSystemBaseDevice.
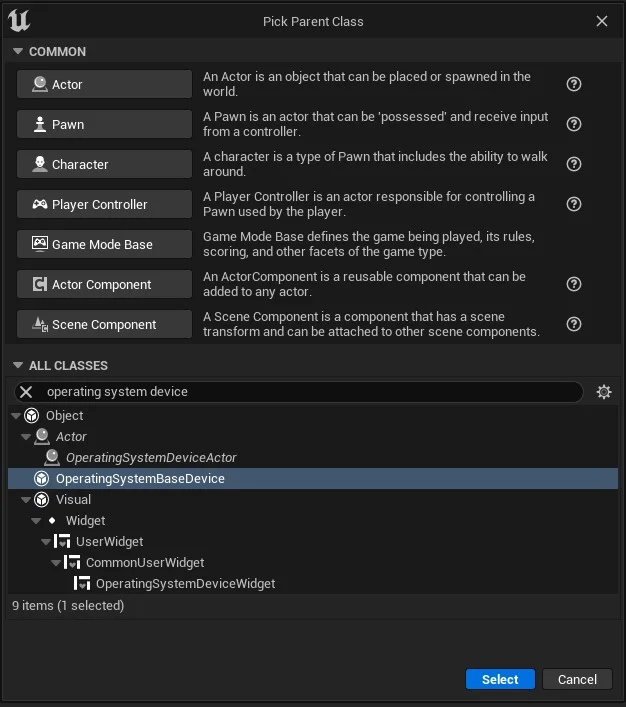
Rename it to BP_Tut_Device and open it. Since a device requires hardware and device widget, we can use the existing ones that came with the plugin.
Once you have assigned all the hardware classes and device widget class, give the device a new name. For this tutorial, I’m simply naming it PC.
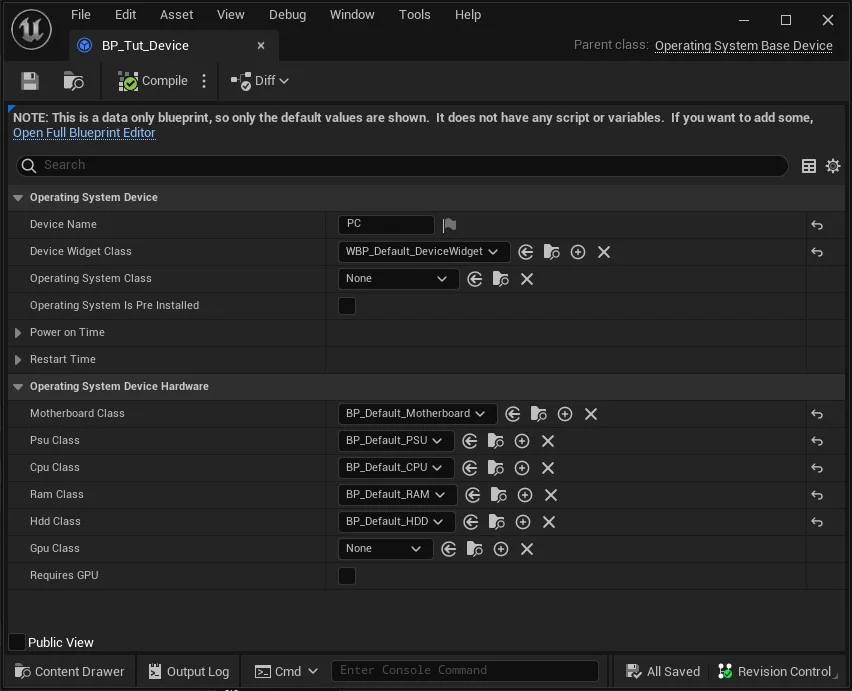
Note that we left the Operating System class blank and that is what we are going to set next. Before that, let’s assign this device to our previously created device actor. Open device actor and assign the device class. See Plugin Classes for the hardware types you can assign on the device Blueprint.
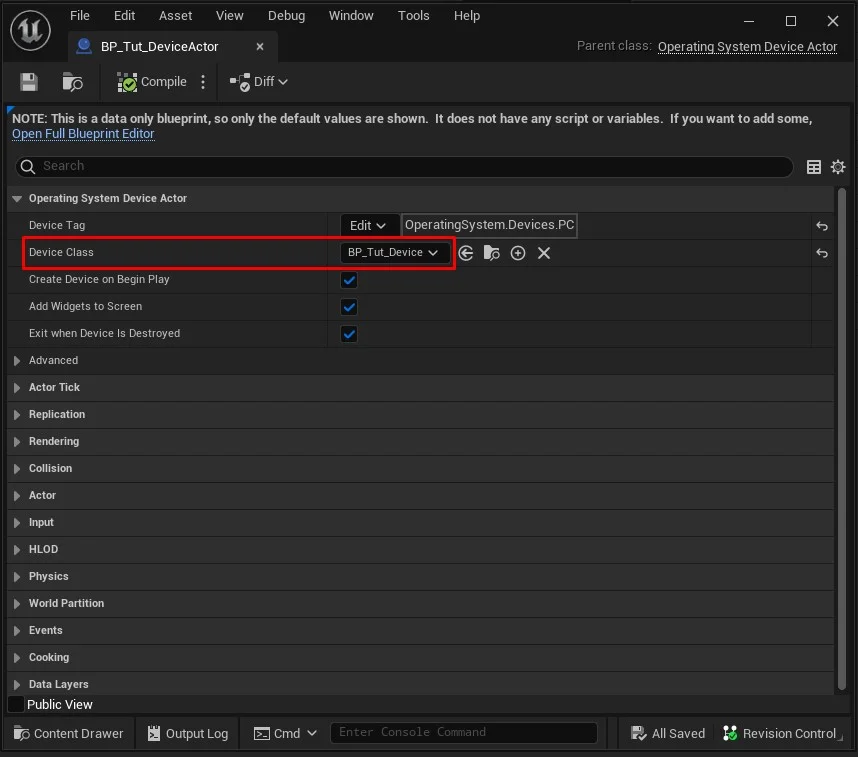
We have completely set our device and device actor. Now let’s move forward to create an Operating System.